Asset list
The Asset List is the central navigation and management interface in IAH, allowing users to view and manage all onboarded assets.
The numbered areas in the screenshot correspond to the following interface sections:
1 Every row contains the information about one asset. Asset details can be shown by clicking the three dots.
3 Open the List settings.
4 A search bar allows you to find any string across all columns.
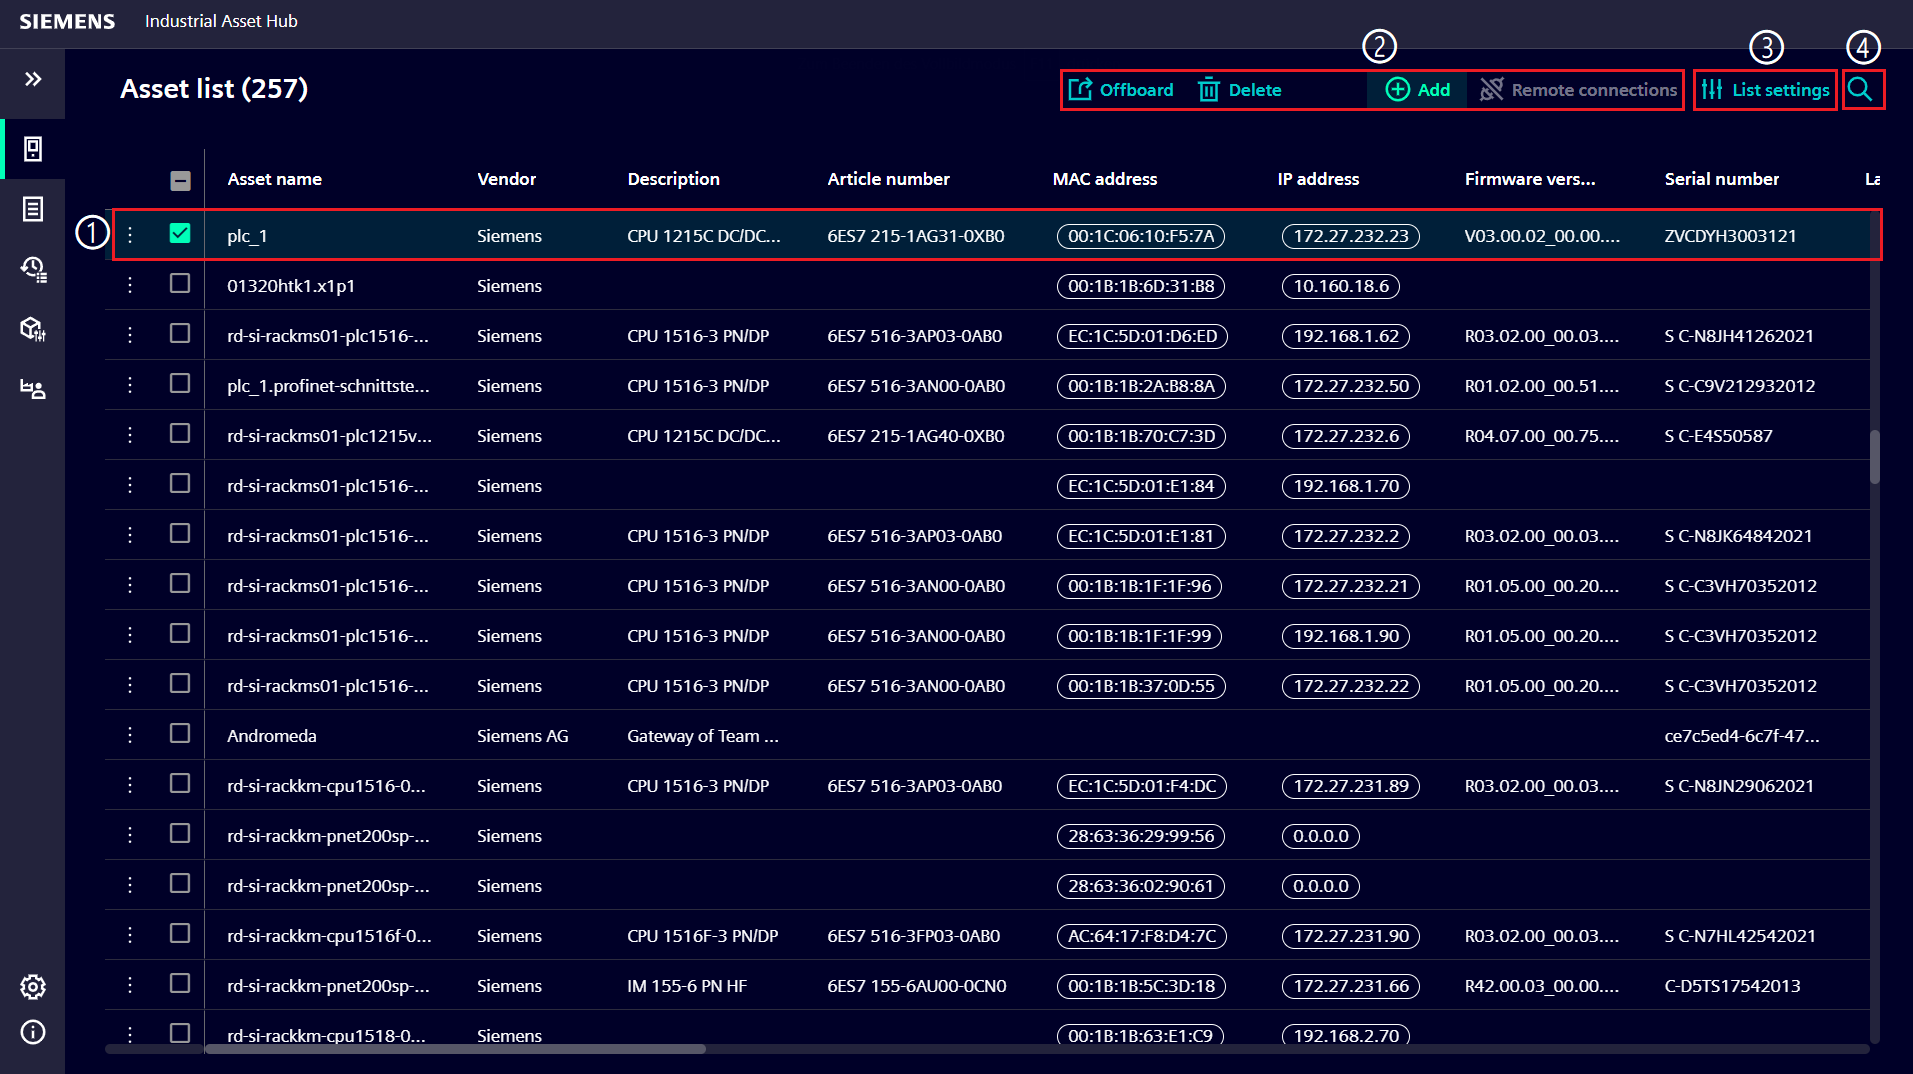 Figure: Asset list with selected asset
List settings
Asset list columns can be shown or hidden in the List settings dialog or additional columns can be created via Add custom property.
Show or hide columns
In the List settings you can choose which columns you want to show or hide by selecting or deselecting. The default sorting of the columns is equivalent to a typical user workflow. After a rearrange of the shown columns in the list the sorting of the columns is equivalent to this order.
Custom property
A custom property allows you to add additional columns to the Asset list.
Add custom property
The custom property column will be displayed in the Asset list where the user can add or edit the Custom property value for each asset.
- Click on List settings.
- Click on Add custom property to open the input field.
- Enter the name of the custom property.
- Click Save. The added custom property will be visible in the list of columns in Asset list settings dialog. By default, the custom property column is set to visible.
- Click OK to close the dialog.
Note
Custom properties are not enforced to be unique.
Edit or delete a custom property
- Open the List settings.
- Click on the three dots on the right of a custom property.
- Select Edit or Delete and follow the instructions.
- Click OK to close the dialog.
Reset to default
The Asset list User settings can be Reset to default which resets the column selection, column order, applied filters, sorting and grouping.
Note
In case a custom property was added or edited or deleted, the Reset to default option is disabled.
Close and re-open the List settings to perform this action.
To reset settings for all lists (Asset list and Inbox), navigate to Reset list settings instead.
Customize the Asset list view
User settings
The following settings will be saved across sessions, thus once you close the IAH and/or browser, the next time you will use IAH again, the settings are retained per user and tenant. If saving of user settings fails, after retrying 3 times, an error will be reported via toast message.
| Setting | Description |
|---|---|
| Column visibility | The Asset list settings dialog allows to show/hide columns |
| Column order | Columns can be re-ordered by drag&drop functionality |
| Column grouping | The grouping of columns can be invoked by a click onto the column header's menu |
| Column filtering | The filtering of columns can be invoked by a click onto the column header's menu |
| Column sorting | The sorting of columns can be invoked by a click onto the column header |
Rearrange columns
Columns can be easily rearranged in the list to the desired position via drag and drop.
Sort and filter the Asset list
Every column in the Asset list can be sorted and filtered.
Sort and filter a column
-
Sort a column by clicking on the column header. The column is marked with an arrow. Click on it to switch between descending or ascending.
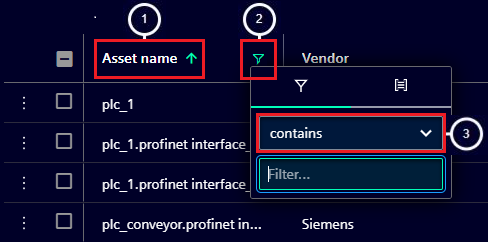
Figure: Sorted Asset name column with filter dialog
-
Open the Filter dialog.
-
The drop-down menu on the filter dialog shows available filter options.
Group the Asset list
Group the Asset list by any column. Actions such as viewing asset details, onboarding/offboarding and so on can still be performed when grouped.
Grouping the Asset list
-
Open the Filter dialog in the column you want to group the list by.
-
Click on the Grouping tab.
-
Click on Group.
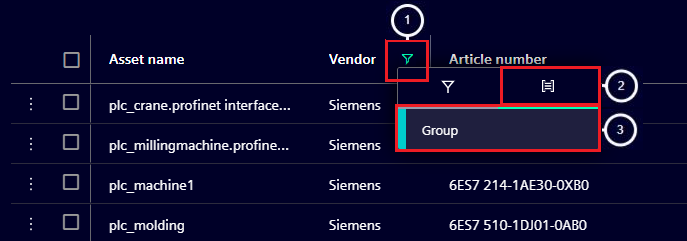
Figure: Group tab selected in filter dialog
Ungroup the Asset list
-
See what the Asset list is grouped by and dismiss the grouping by clicking the X within the pill.
-
Click on the Arrow to collapse or unfold the contents of the grouped list.
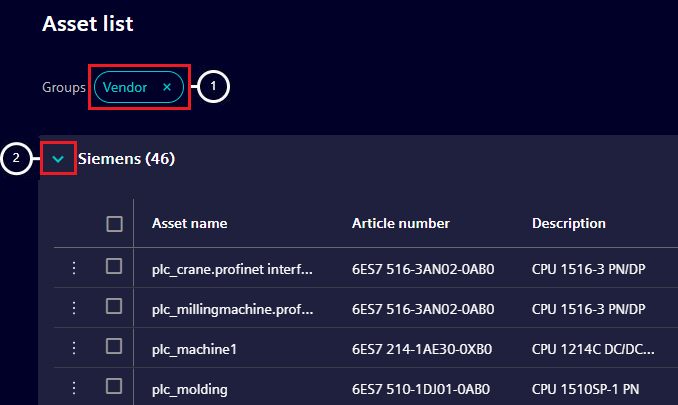
Figure: Asset list after grouping of column Vendor
Add additional information to an asset
Labels
In the column Labels user-specific attributes can be assigned to an asset.
-
Hover in the Labels column over the desired row. The Edit symbol appears. Click on it to open the Labels dialog.
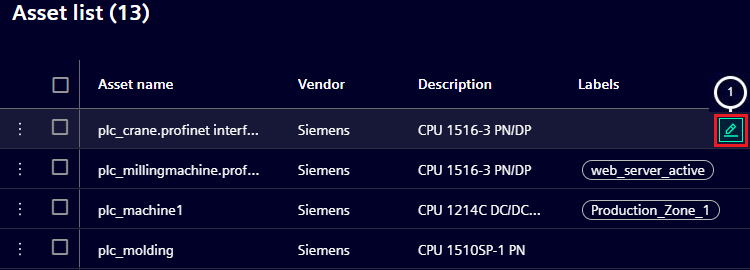
Figure: Open Labels dialog
-
Insert a label or add more labels by pressing Space.
-
Save the changes by pressing Enter or OK.
Custom property value
In the column added as custom property user-specific value can be assigned to an asset.
-
Double-click inside the custom property column in the desired row. The custom property value enters the edit mode.
-
Enter a value.
-
Save the changes by leaving the edited cell by e.g. pressing Enter or clicking in another cell.
Access group column
Access groups structure your assets or restrict access to certain assets for certain users.
In the List settings of the Asset list, enable the Access group column to see the Access group entries for each asset.
If the Access group feature is not used, leave the Access group column entries untouched. All assets are automatically assigned to the default Access group.
If Access groups are used, assigning users to Access groups can only be done by users with the user_admin role.
The Access group of an asset can be changed by renaming it.
For further information, refer to Configure Access Management page.
Asset responsible column
The user onboarding an asset automatically becomes the asset responsible. It is displayed using the assigned e-mail address as a separate column.
In case of a non-human user, the phrase Server user and the corresponding user id are displayed.
Changing an asset's responsible person can only be done by IAH administrator users. To change an asset's responsible person, double-click on the asset responsible and select a different user from the list.
Note
This method only allows changing the responsible person, not removing them. To remove a responsible person completely, you must offboard the asset.
Asset details
Detailed information about any asset can be found in the Asset details.
-
Click on the three dots on the far left of a row and click View details.
-
Click on the three dots of a different asset opens its Asset details and closes the previous one in the process.
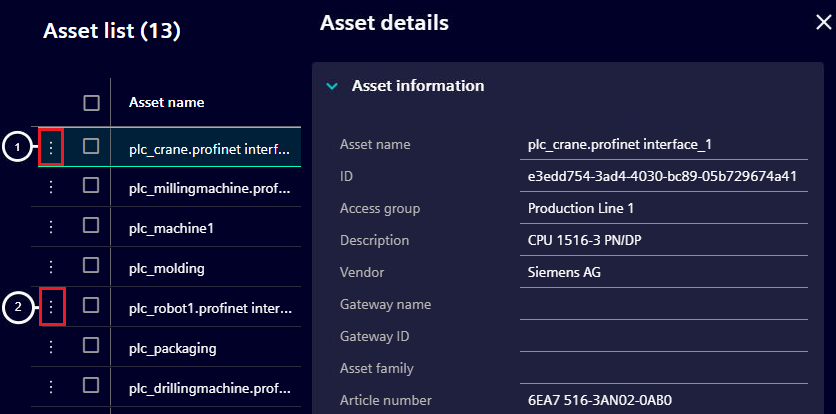
Figure: Asset details of the selected asset
Leading view
Most assets can be discovered by multiple Asset Links. The views in the Asset list and in the asset details represents the results of the first Asset Link that discovered this specific asset.
To switch to a different leading view for an asset:
-
Click on the three dots on the far left of a row and click View details.
-
Click on the drop-down menu of the "Leading view" and select the Asset link that provides the desired view. The Asset details are refreshed automatically. The Asset list needs to be manually refreshed.

Figure: Setting the leading view of an asset
Remote connection
A remote connection can be established to an asset to view and manage it via its web/ssh server.
Preconditions:
- Admin or Supervisor role
- Member of the Access group of the remote connection's asset
- Device has a valid IP address and is associated with a gateway ID
For further information, refer to the Configure Access Management page.
Establish a remote connection
For establishing a remote connection to an asset:
- Click on the three dots on the far left of the row.
- Click Establish remote connection.
- Select the Connection Type in the drop-down. The default port for the chosen type is entered in the input field. If necessary, change it according to your configuration.
- Click Connect to initiate the remote connection.
- When the remote connection process is initiated, click on Remote connections to access the connected asset web/ssh server or to disconnect the remote connection.
Information on the status of the remote connections can be found on the Jobs page. This page provides also additional information to the remote connections.
Note
- For the remote connection to be usable, the asset must expose its web server via http or https on a specific port. For ssh server, the asset must expose its specific port.
- Establish remote connection button will be disabled for the assets that do not have any Asset Gateway associated with them.
Remote connections
Open the web/ssh server of an established remote connection or disconnect a session.
-
Click on the Remote connections button on the upper right corner.
-
A dialog appears, which shows all the remote connections initiated or established.
-
Once the connection has been established, the Open link to the session is shown on the dialog. The session is valid for a maximum of 12 hours after which it is automatically terminated.
-
Click Open to access the web/ssh server of the connected asset. This will open the web server page or ssh terminal in a new tab.
-
Click Disconnect for disconnecting an active remote connection.
Note
- If a remote connection remains inactive for 1 hour, credentials expire and a 404 error is shown. To reestablish the session, open the remote connection url once again from the list of remote connections.
- Accessing multiple remote connection web/ssh servers within a single browser is supported.
- The remote connection web server supports a maximum file size of 150 MB for downloading or uploading files.
Remote connections with Access groups
- All users within the same tenant can view all remote connections for that tenant, but only users who have access to the asset's Access group can perform operations on those connections.
- If the Access group of an asset with an active remote connection is changed, only users in the new Access group will be able to perform operations on that connection.
Actions in the Asset list
Actions can be started for each asset by selection. The actions are Offboard, Delete or Add assets.
Action 'Offboard'
Discovered and manually added assets can be offboarded. The offboard moves the assets to the Inbox.
- Select the asset(s) you want to offboard via checkbox.
- Click Offboard.
- A dialog appears in order to confirm the offboard assets action.
- Optionally expand the blind, to view the selected assets.
- Click OK to offboard the assets.
Action 'Delete'
Asset(s) can be removed after selection using the Delete button.
Note
Assets that have been selected will be shown within the confirm dialog. There will be no changes applied to the physical edge assets in the factory.
Action 'Add'
Manual entry: Assets that could not be discovered via the Inbox scan can be added manually.
- Click Add and select Manual entry.
- Fill out the mandatory fields.
- For Access groups, if the feature is not used, leave the input field blank. The asset is automatically assigned to the default Access group. Enter an Access group to use the feature. If a new Access group name is entered, the asset will disappear until the user is assigned to the new Access group by the administrator.
- Click Add to save the new asset and to close the dialog.
Note
Duplicate MAC addresses are not allowed.
File import: Assets can be imported via an Excel file import.
- Click Add and select File import.
- Follow the description from the dialog.
- Click Import.
For further information, refer to the Excel Import page.
UI keyboard navigation
| Key combination | Function |
|---|---|
| Arrow up/ Arrow down | Navigates between assets within the Asset list. |
| Return | Performs a left mouse click. |
| Tab | Navigates between controls and/or cells in a predefined order. |
| Tab + Shift | Navigates between controls and/or cells in reverse order. |
| Escape | Close any open dialog. When editing data, it cancels editing and discards any changes made. |
| Space | Check or uncheck a checkbox. |