Setup Guide for Administrators
This guide is designed for Industrial Asset Hub (IAH) administrators. It covers user management, infrastructure setup using Siemens Industrial Edge, deploying the Asset Gateway, and verifying your connection to industrial devices.
1. User Management and Security
Once users are added via the Xcelerator Admin Console, they gain access to the IAH application.
Roles and Permissions
- First User: The very first user to access the IAH application is automatically assigned the Administrator role.
- Subsequent Users: Any subsequent users logging in are granted the least permissive privileges by default.
- Role Management: The IAH administrator can reassign roles to expand or restrict user functionality. For further information, see Configure Access Management.
Securing Server Credentials
Credentials for a "Server user" (used for API access) are self-serviced in the Xcelerator Admin Console. Because these credentials grant broad access, administrators must handle them with extreme care:
Security Best Practices for Server Credentials
- Always encrypt credentials during transfer.
- Store them in a secure, centralized secrets manager.
- Strictly enforce the principle of least privilege regarding who can access them.
2. Infrastructure Setup: Industrial Edge
IAH provides transparent, centralized status for field devices discovered by apps like the SIMATIC Automation Tool and Asset Gateway running on Industrial Edge Devices (IED).
Preparing the Industrial Edge Environment
Ensure your Industrial Edge Management (IEM) and Industrial Edge Devices (IED) follow the official Setup Guidelines and Recommendations. Validate that endpoints listed in the Network security guide are reachable.
Onboarding the IED to the IEM
Your IED must be registered with your IEM and connected to a network capable of reaching both the IEM, the IAH cloud, and your local assets.
Browser Recommendation
Use Google Chrome when accessing Edge Management UIs to avoid compatibility issues.
- Gather Device Info: Obtain the IP address and MAC address of your IED (often visible on an attached monitor during IED startup or via a switch management console).
- Access IEM: Log in to your Industrial Edge Management UI (
https://<IEM_Address>). - Add Device: Navigate to Edge Devices and click the + (New Edge Device) button.
- Configure Device: Provide a name, a local username, and a password for the device.
- Finalize Network: Click Next, add the network configuration, and input the MAC address.
- Import Config: Take the resulting onboarding file and import it onto the physical IED.
Configuring the IED Network (Layer 2)
To discover assets effectively (e.g., using the SIMATIC Automation Tool), your IED requires Layer 2 network access to the target subnet.
- Connect to the IED's local UI (
https://<IED_IP>). - Complete the network configuration by enabling and assigning the Layer 2 interface that bridges to your asset network.
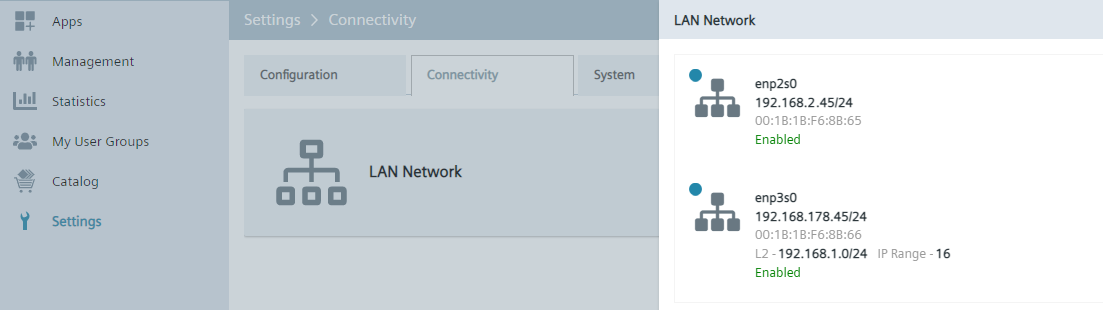
Figure: Network configuration of the IED
3. Deploying the Asset Gateway
Deploying the Asset Gateway is a two-step process: first creating the logical gateway in the IAH cloud to get a configuration file, and then installing the application on your physical IED.
Note
Assign the Asset Gateway application to your IEM from the Industrial Edge Marketplace.
Step 1: Create the Gateway in IAH
- Log in to the IAH application.
- Go to the Gateway configuration page.
- Click the Add Gateway button (
 ) at the top right.
 - Provide a name and optional description. (Duplicate names are allowed; the system uses a unique ID).
- (Optional) Specify an Access group. If left blank, it defaults to your standard group.
-
Click Add and download.
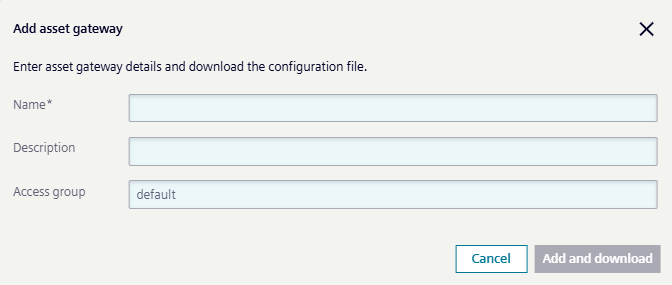
Figure: Add asset gateway dialog
Secure the Configuration File
The downloaded gateway-config.json contains a registration token valid for only 30 minutes.
This token authenticates the physical device to your cloud tenant.
Treat this file like an admin password. Do not share it.
If the token expires before you finish installation, you can generate a new one by opening the Gateway details in IAH and clicking Create new.
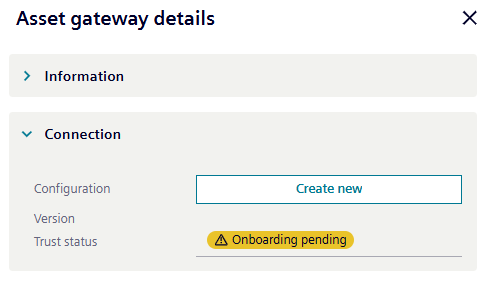
Figure: Recreate Asset Gateway configuration in Asset gateway details
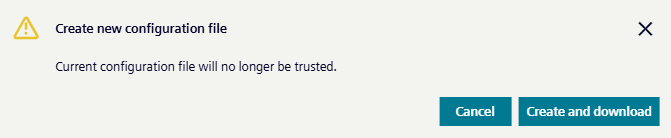
Figure: Asset Gateway recreation dialog
Step 2: Install the Gateway on the IED
-
In your IEM, go to the Catalog and click Asset Gateway.
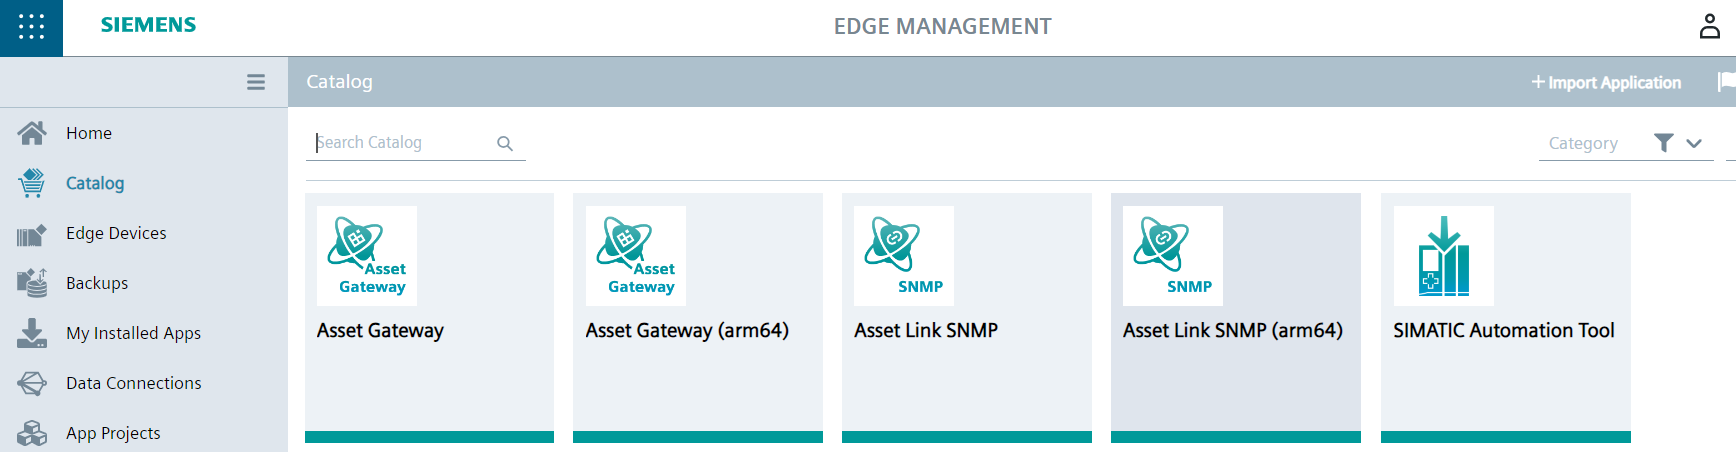
Figure: Applications in the catalog of the IEM -
Click Install.
- Check the box next to
gateway-config.json. - Click the Edit (pencil) icon.
- Paste the entire contents of the file you downloaded from IAH into the editor (see example below).
- Optional If your network requires a proxy, manually add the required values to respective proxy setting before saving (see example below).
- Optional If you want to enable passive scanning via the Default IP Scanner, set
passiveScan.enabledtotrue. For further information see Default IP Scanner - Click Update.
- Click Next.
- Select your target IED.
-
Click Install Now.
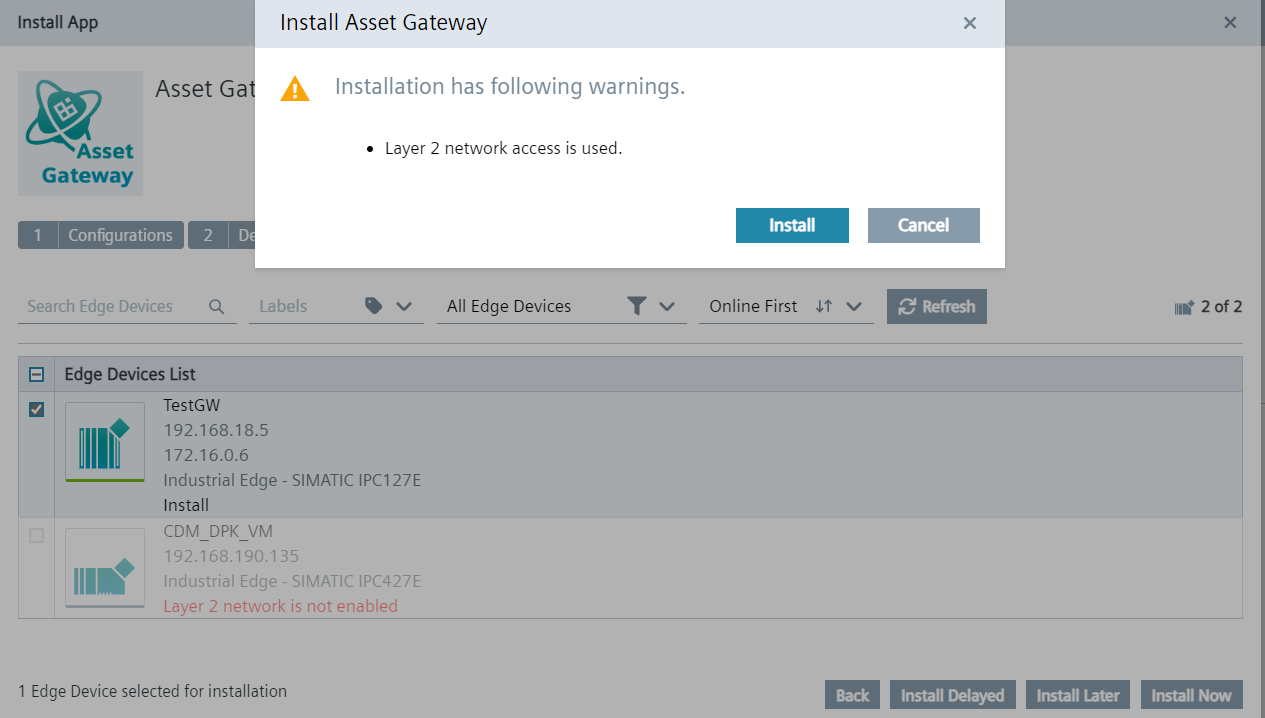
Figure: Asset Gateway Installation -
Check the IAH web interface to verify the gateway has connected. Once connected, the hourglass icon will disappear.
{
   "gatewayId": "<gateway_id>",
   "xfUrl": "https://gateway.<region>.sws.siemens.com/...",
   "registrationToken": "<jwt>",
   "httpsProxy": "https://proxy.example.com:8080",
   "httpProxy": "",
   "noProxy": "",
   "appConfig": {
     "defaultIPScanner": {
       "passiveScan": {
         "enabled": false,
         "networkInterface": "eth0"
         }
      }
   }
}
Figure: Example of a gateway-configuration.json file
Note
If the gateway doesn't connect, you may need to restart the app on the IED.
Updating the Asset Gateway version
To deploy a newer version of the Asset Gateway:
- In the IEM Catalog, click Asset Gateway and press Install.
- Do not check the
gateway-config.jsonbox. Just click Next. - Select your Edge Device and click Install Now.
Update the Asset Gateway configuration
To update the configuration of an already installed Asset Gateway (e.g., to change proxy settings or enable passive scanning):
- In the IEM select My Installed Apps.
- Find your Edge Device and click at the three dots of the IAH Asset Gateway app.
- Select Update configuration.
- Check the box next to
gateway-config.jsonand click the Edit (pencil) icon. - Paste the adapted configuration as needed and click Update.
- Select Operation - Restart in the dropdown and click Update Now.
(For deleting a gateway, see Deleting gateway.)
4. Deploying Asset Links
Asset Links act as the protocol-specific middleware (e.g., PROFINET, SNMP, Ethernet IP) between the gateway and your field devices. They are also installed via the IEM catalog.
GRPC Registry Configuration
All Asset Links communicating with the Asset Gateway on the IED must use the following gRPC registry settings:
- Host name:
grpc-server-registry - Port:
50051
SIMATIC Automation Tool
- In IEM Catalog, click SIMATIC Automation Tool and click Install.
-
Select the target IED and click Install Now.
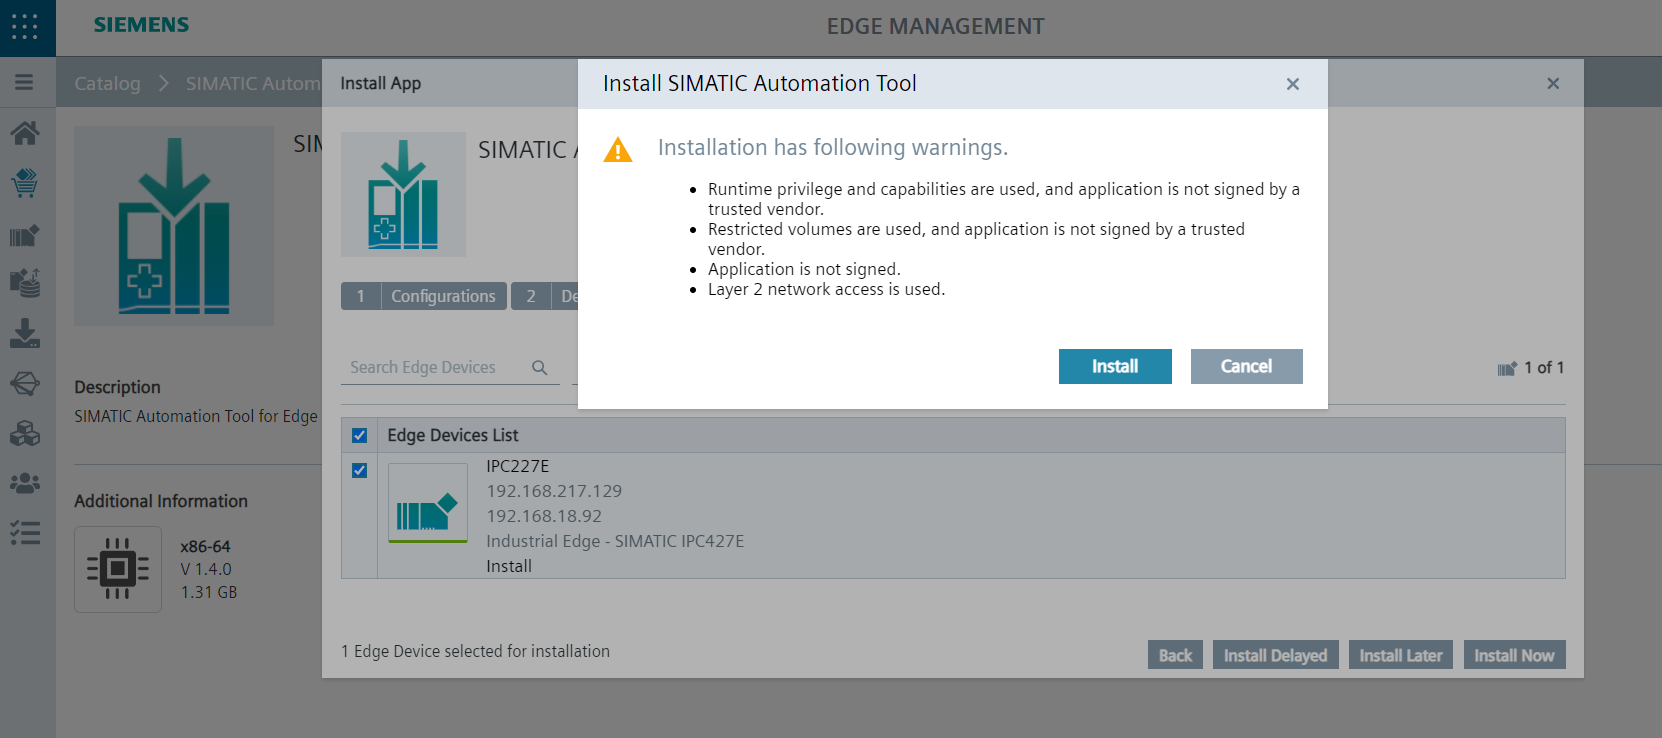
Figure: Install dialog of the SIMATIC Automation Tool
Asset Link SNMP
- In IEM Catalog, click Asset Link SNMP and click Install, then Next.
- Edit
snmp.jsonby clicking the pencil icon. - Define your SNMP profiles (defaults to V1/V2c with 'public' community string if left blank). Click Update.
-
Select the target IED and click Install Now.
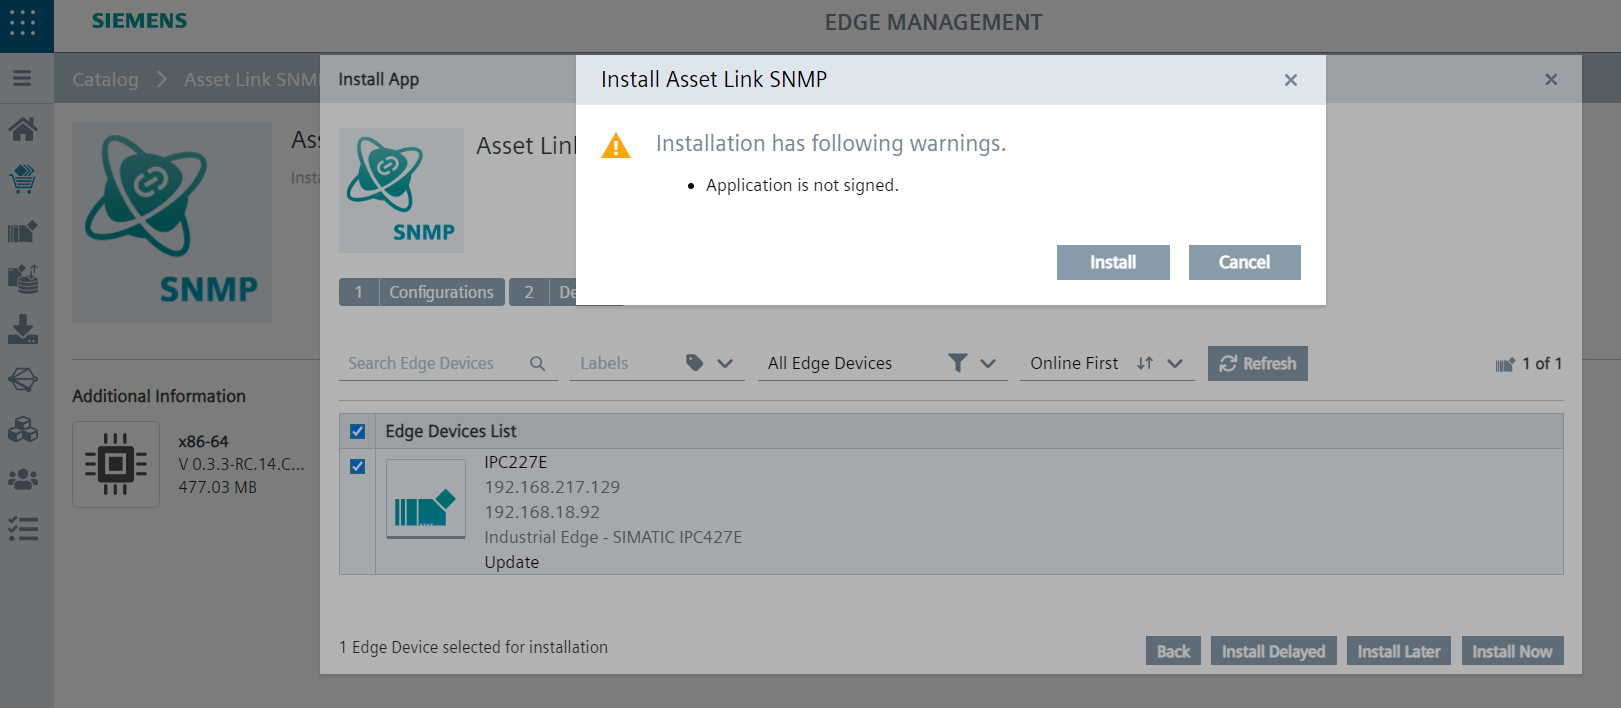
Figure: Install dialog of the Asset Link SNMP
PROFINET Asset Service
- In IEM Catalog, click PROFINET Asset Service and click Install.
- Edit
connector-config.json. - Replace
cssvcregistrywithgrpc-server-registry. Click Update. - Click Next, select the IED, and click Install Now.
Ethernet IP Connector
- In IEM Catalog, click Ethernet IP Connector and click Install on device.
- Select the Edge Device.
-
Configure the Discovery Broadcast parameter to match the subnet of your Ethernet IP devices and click the icon to activate the configuration.
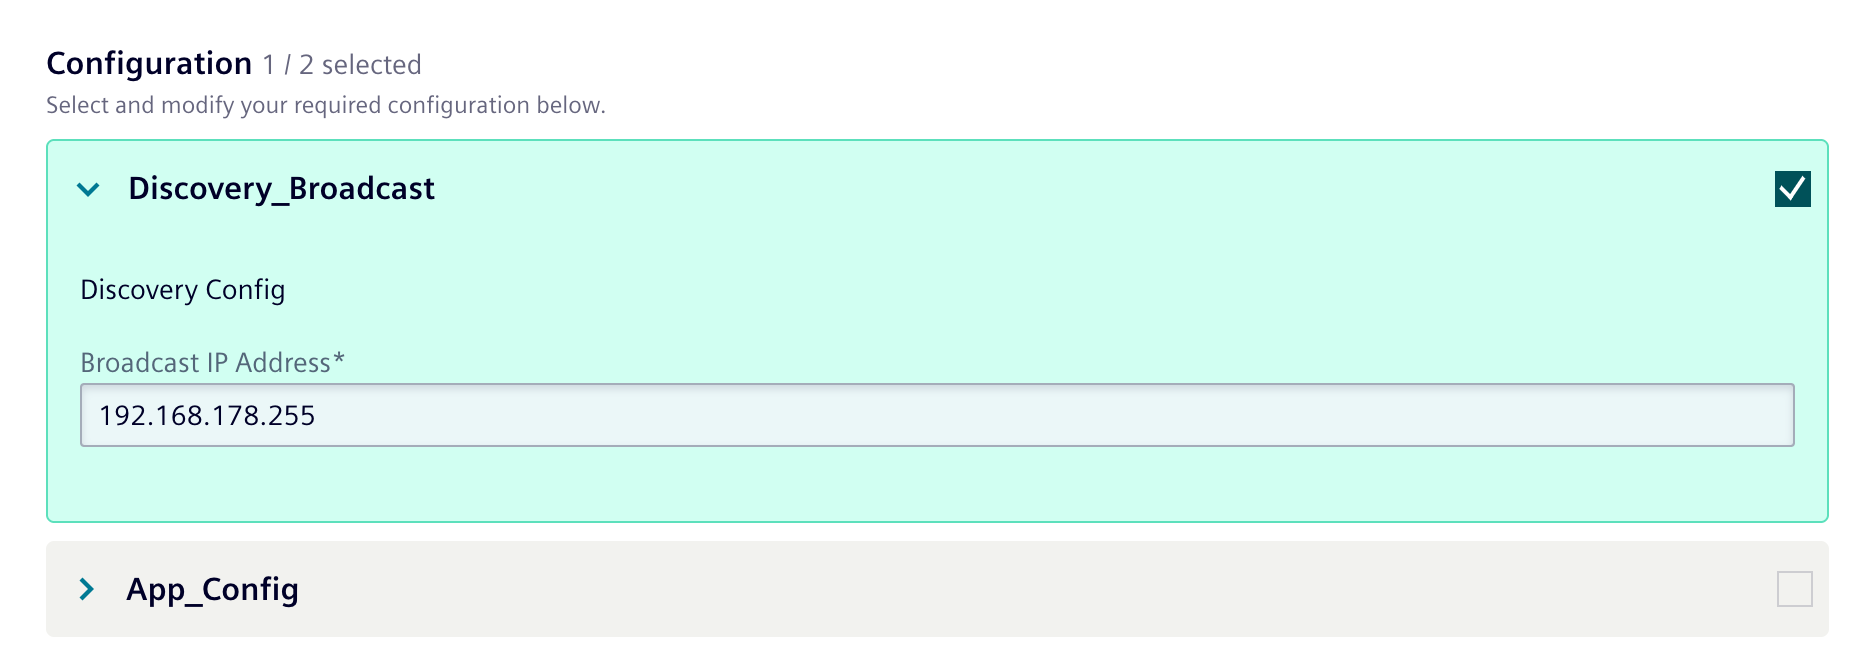
Figure: Discover Broadcast Configuration
4. Click Next, select the devices, and click Install Now.
5. Verification and Next Steps
With your gateway and links deployed, verify that everything is communicating correctly.
Check Local Connectivity (IED to Assets)
-
Log in to the local UI of your IED (
https://<IED_IP>).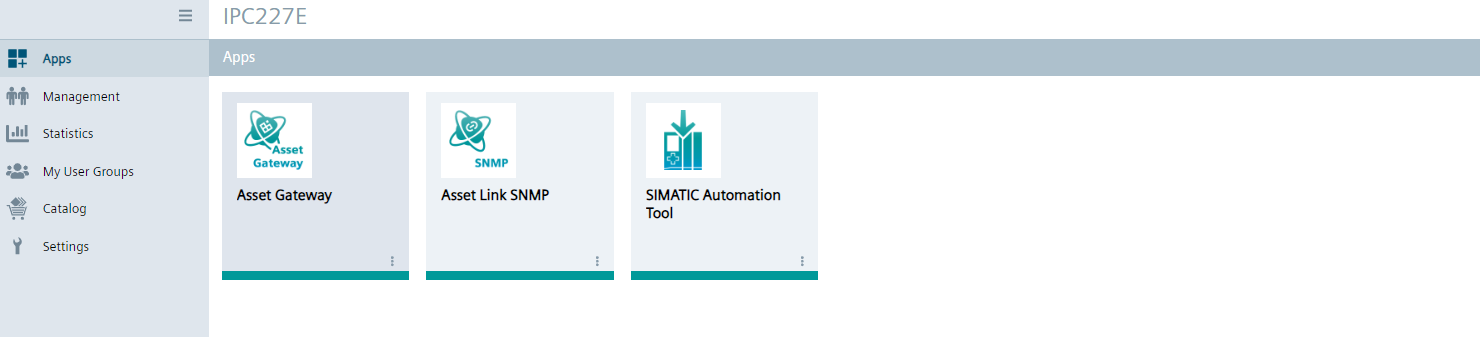
Figure: Apps in the IED -
Open the SIMATIC Automation Tool app.
-
Click RESCAN to force a local broadcast. You should see your local network assets appear in the list.
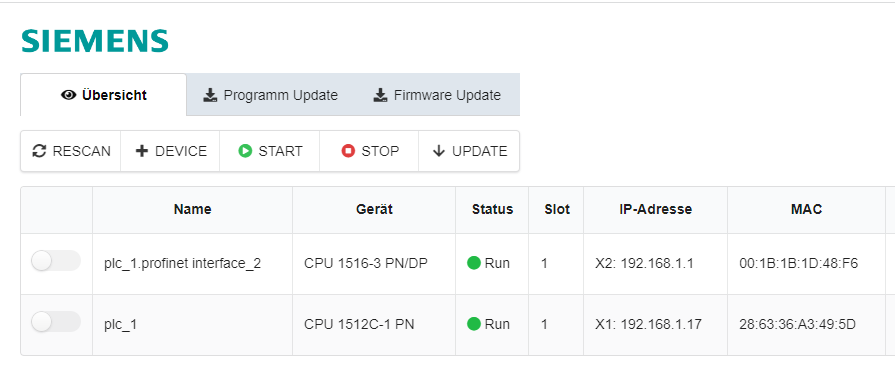
Figure: Assets shown by SIMATIC Automation Tool
(If the scan hangs, restart the SIMATIC Automation Tool application from the IED management page).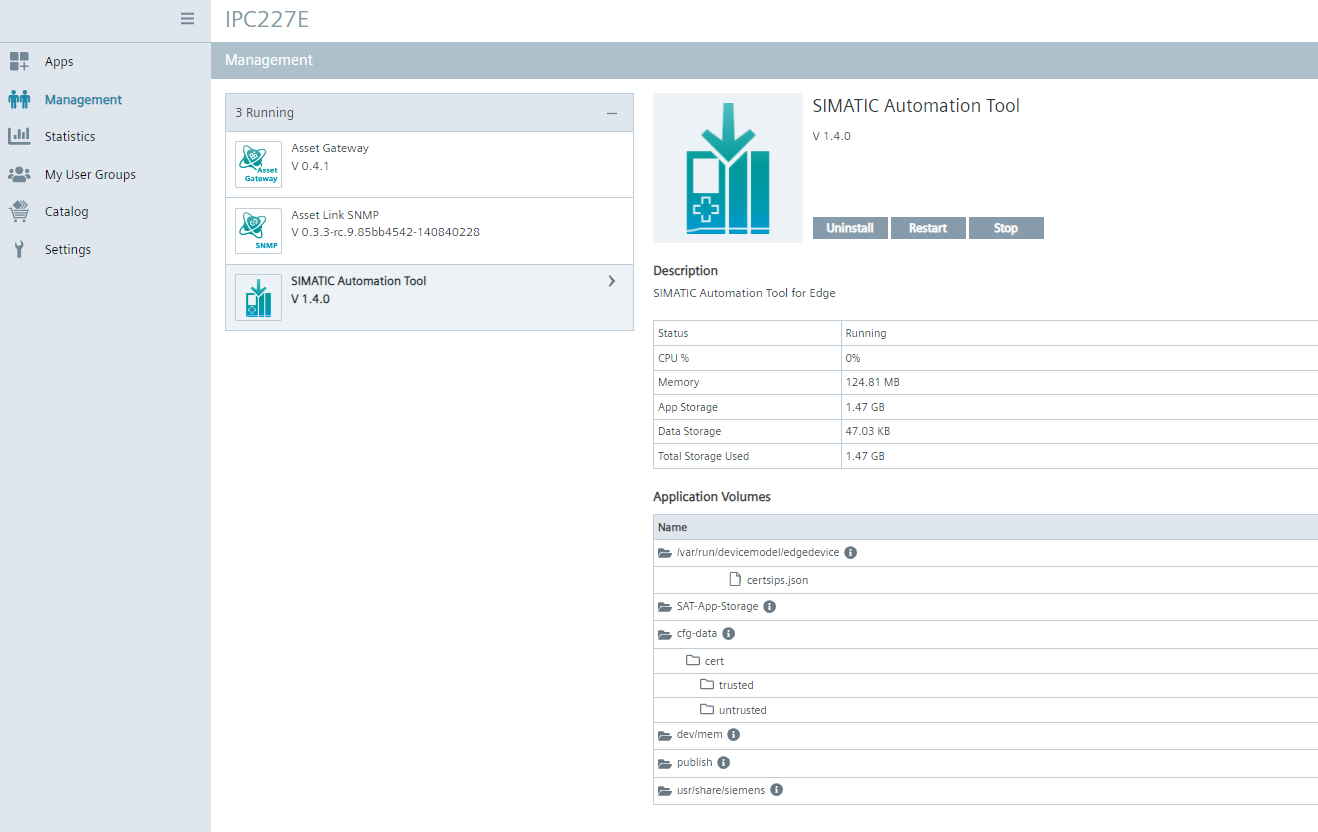
Figure: Dialog to restart the application SIMATIC Automation Tool
Run Your First Cloud Discovery Scan
- Open the IAH application and navigate to the Inbox.
- Click Scan.
- Select your onboarded Asset Gateway and the desired Asset Link (e.g., SIMATIC Automation Tool).
- Click Scan to initiate the process. Once complete, your newly discovered assets will populate in the IAH interface.